Creation of a two color sign
Private Collection
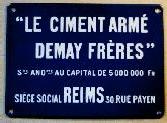
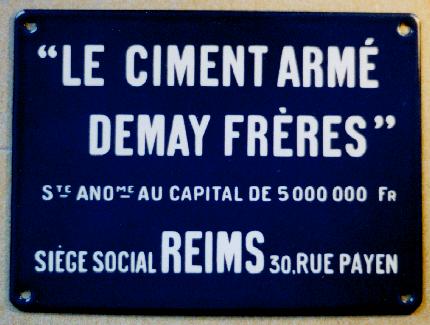
Here are the successive steps necessary to the realization of
this 15 x 20 cm single-sided blue enamelled sign with white lettering.

First of all the crude steel sheet formatted (cutting,
shaping, drilling, scouring cleaning, degreasing...) The part must be
absolutly free of oxidation traces and uncleanness to be
able to be enamelled.
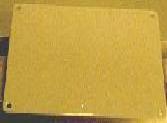
The sheet receives then basic enamel, the primer slury (gray
color). This enamel is the only one able to be welded perfectly with
steel. The enamels for color, from their composition, do not have this
faculty. The primer slury will constitute a protection of steel and will
ensure the adherence for enamels of color during their fusion. After
drying of this slury will intervene the cooking.

After cooking the slury took its color dark / black gray.
The sheet will cool before passing at the following step.
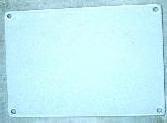
The sheet thus coated now will be covered with white enamel.
After drying it will turn over to the kiln. This white color
will be used for lettering.

Following a new cooling the sheet is ready to receive its
blue enamel which will constitute the background of the text.
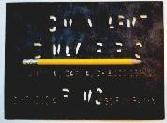
 Here is the stencil which will be placed over the blue
enamel. The brushing operation can then take place. It will have for
goal to eliminate the blue enamel which will not be protected by
cuttings from the stencil.
Here is the stencil which will be placed over the blue
enamel. The brushing operation can then take place. It will have for
goal to eliminate the blue enamel which will not be protected by
cuttings from the stencil.
Note (by clicking on the stencil) that the letters
are not completely cut out but it remains fasteners. These
fasteners make it possible to keep stencil in good form and
especially to avoid having, for example a hole instead of a "O".

Here is the result of brushing. The blue enamel thus brushed
lets appear the layer of white enamel cooked previously. You can
see here that the fasteners appear. they should now be brushed.
For the brushing of the fasteners, an other stencil
will be used. This stencil will leave accessible
to brushing only the fasteners. This operation requires delicacy (the
enamel before cooking is very friable) and requires an irreproachable
stencil (size of cuttings) compared to the first one used.

When the preceding step is finished, the sheet is ready for
its third and last cooking.
The sheet came out of the kiln, the blue enamel took its
final color.
In this example the text is in 'hollow' compared to the
background. Another technique allows the opposite (difference between the
negative and positive stencil). This manufacture follows the
traditional method. This stencil dates from the years
1930-1940.

Return to the History page

 Here is the stencil which will be placed over the blue
enamel. The brushing operation can then take place. It will have for
goal to eliminate the blue enamel which will not be protected by
cuttings from the stencil.
Here is the stencil which will be placed over the blue
enamel. The brushing operation can then take place. It will have for
goal to eliminate the blue enamel which will not be protected by
cuttings from the stencil.
